Coating Thickness Gauge for Testing Re-manufactured Parts Coating Thickness
Processing and reuse of waste parts is one of the important ways to solve the lack of resources. This part uses industrial waste and old materials as the raw material and then uses the surface spray coating remanufacturing technology to form a reinforced coating layer to restore the worn size of the old part. This coating not only needs to restore the size of the old part, but also has wear resistance, corrosion resistance, high temperature resistance, etc., so as to form a new usable part. Therefore, it is important to measure the coating thickness on the part surface with a coating thickness gauge.
I. Influence of coating thickness on parts
Crankshafts, as important parts of engines, have become the focus of parts remanufacturing due to their high price, complex internal structure and high added value. There are many types of damage to this part, such as the failure of the coating, which mainly include cracks on the surface of the coating and poor adhesion of the coating, which results in delamination of the coating. Similarly, the unqualified coating thickness is also an important factor in the damage of these parts. Because the thickness of the coating is not up to standard, it will not only cause cracks on the surface of the part, but also make the crankshaft and other parts not fit well, resulting in the part being unusable. Therefore, when a rebuilt part is completed, it is necessary to use a coating thickness gauge to measure whether the coating thickness is acceptable.
2. Relationship between coating thickness and crack growth
When the thickness of the conductive coating on the alloy substrate is reduced from 2.5mm to 1mm, its hardness decreases by about 6% and its bending resistance decreases by about 10%. For ceramic coatings with a small thickness, the crack mode of coating failure is mainly multiple transverse cracks. When the coating thickness is measured with a coating thickness gauge, the thermal spraying method may cause a crack mode between the substrate and the coating. The experimental study found that when the coating thickness was 0.25 mm, the coating on the substrate was free of cracks. When the coating thickness is 0.5mm and 0.75mm, there are more propagation cracks in the coating. When the coating thickness is 1 mm, cracks spread throughout the coating substrate. Therefore, the coating thickness should be measured with a coating thickness gauge to avoid unnecessary losses.
3. Choose the appropriate coating thickness gauge
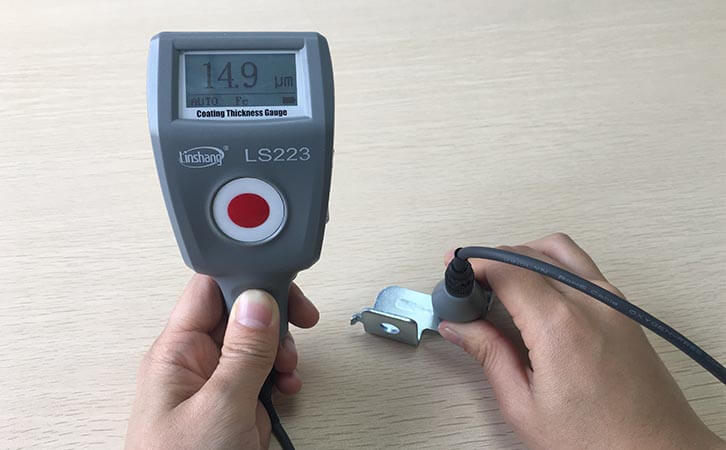
Linshang coating thickness gaugeis an instrument that combines two measuring principles, magnetic method and eddy current method. If measuring the coating thickness on the crankshaft surface, it is recommended to use LS223 coating thickness gauge + F3N3 probe. This coating thickness gauge has a wide measurement range and adopts a split design of the probe and the host, which can be used in the laboratory and the construction site. It is convenient to view the data while measuring. The instrument can measure non-magnetic coatings on magnetic surfaces and non-conductive coatings on non-magnetic metal substrates. It is very convenient to use. The minimum measuring aperture of this instrument is: ? = 25mm. Measurement is very convenient!
For more information, please contact Linshang technical staff!
- High precision coating thickness gauge for used car
- Automotive paint protection films coating thickness gauge
- Plating Thickness Measuring Instrument for Detecting Anti-corrosion Coating
- Linshang LS220, LS191, LS160A– Necessary for Car Cover Inspection
- Coating Thickness Gauge for Second Hand Vehicle
- Zero Adjustment Step of Coating Thickness Gauge
