How to Measure Coating Thickness with a Paint Thickness Tester?
Paint thickness testers are often used to detect coatings on various metal surfaces,the thickness of the cover and the paint film.It is not the same as the thickness measurement of common items.Therefore,many customers know the operation method well,otherwise it is easy to get meaningless test results in the operation due to the wrong method of use.Therefore, this article will detail how to use a paint thickness tester.
The current common paint thickness tester principle is magnetic or eddy current,both of which require zero adjustment.Therefore,the zero adjustment step before use is also included in the answer of how to use the paint thickness tester.We explain this problem in detail by taking Linshang LS221 paint thickness tester as an example.
1. Paint thickness tester - parameter settings
The LS221 paint thickness tester uses two measurement principles.The magnetic method is applied to the measurement of the coating thickness on the ferromagnetic metal substrate. The ferromagnetic metal mainly includes our common iron,cobalt,nickel,manganese and steel. The eddy current method is applicable to the measurement of the coating thickness on the non-magnetic metal substrate. Except for the above-mentioned several ferromagnetic metals, other metals are basically non-magnetic,such as aluminum, copper,die-cast zinc.If the type of metal matrix is not known,the instrument also provides a measurement mode that automatically identifies the measuring substrate.
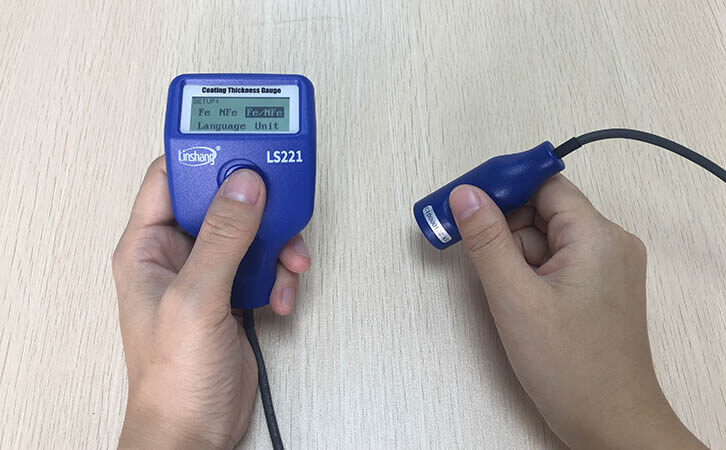
The specific operation is: long press the power button in the off state,the instrument will enter the parameter setting mode,we can switch the option by short pressing the power button.The first line is the measurement mode.The Fe mode is the magnetic metal matrix measurement mode,the NFe mode is the non-magnetic metal matrix measurement mode.Fe/NFe is the mode for automatically identifying the measurement substrate. The second is the language switching (Language) and unit (Unit) switching. Short press the power button to switch options. After selecting the option,wait about 3s to enter the measurement mode.
How does the paint thickness tester work?
2. Paint thickness tester–zero adjustment
After entering the measurement mode,we need to make zero adjustment with a metal substrate that is uncoated or use the factory-equipped zero adjustment board.The specific method is to press the instrument vertically on the substrate or the zero adjustment board to keep the position unchanged.Press the power button briefly and lift the instrument to a position at least 15cm up from the zero adjustment board according to the prompt on the screen and hear the beep.After that,the zero adjustment is completed.At this time, the instrument will show 0.0.
3. Paint thickness tester- measurement
After the zero adjustment is completed,the coating can be measured.It is also required to press the instrument vertically on the tested coating and the instrument will immediately display the test result.If the substrate needs to be replaced for the new measurement or the testing environment changed,we suggest a new zero adjustment.After stopping the measurement, it is recommended to long press the power button to power off the instrument and put it back into the box of the instrument.
How to use a paint thickness tester? On this issue,our answer is mainly the three major steps mentioned above.In step one,we recommend using a third measurement mode that automatically identifies the substrate,making the operation simpler and more convenient.If you have more questions,please feel free to contact us.
- High precision coating thickness gauge for used car
- Automotive paint protection films coating thickness gauge
- Plating Thickness Measuring Instrument for Detecting Anti-corrosion Coating
- Linshang LS220, LS191, LS160A– Necessary for Car Cover Inspection
- Coating Thickness Gauge for Second Hand Vehicle
- Zero Adjustment Step of Coating Thickness Gauge
