The Proper Nouns Explanation of Coating Thickness Gauge
Coating thickness gauge has the characteristics of small measurement error, high reliability, good stability and easy operation. It is an indispensable instrument for controlling and ensuring product quality. It is widely used in manufacturing, metal processing, chemical industry, Inspection areas such as commodity inspection. There are many professional terms in the specification of the coating thickness gauge, and we will explain these proper nouns in detail.
1. The role of the coating thickness gauge
The coating thickness gauge can measure the thickness of non-magnetic coatings (such as steel, iron, alloy and hard magnetic steel) on ferromagnetic metal substrates (such as aluminum, chromium, copper, tantalum, rubber, paint, etc.) and the thickness of a non-conductive coating (such as tantalum, rubber, paint, plastic, etc.) on a non-ferrous substrate (such as copper, aluminum, zinc, tin, etc.).
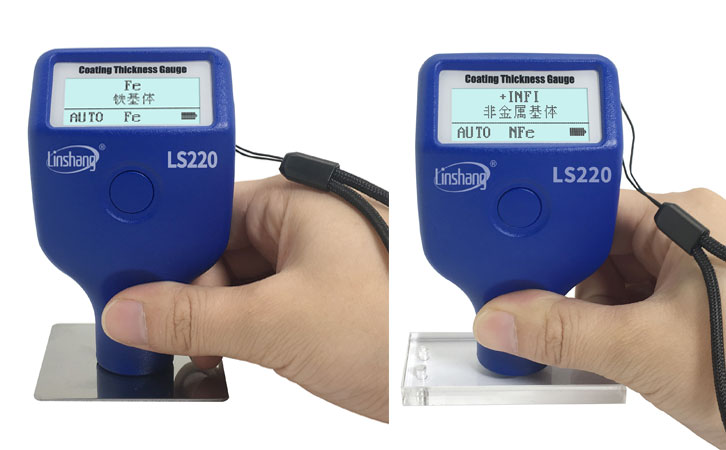
Fe measurement mode
Fe stands for ferromagnetic substrate. The coating on the ferromagnetic substrate is measured by the principle of electromagnetic induction. This mode is called Fe mode. This mode can measure the thickness of non-ferromagnetic coatings (such as paint, powder, plastic, rubber, synthetic materials, phosphating layer, chromium, zinc, lead, aluminum, Tin, cadmium, porcelain, bismuth, oxide layer, etc.) on ferromagnetic metal substrates such as steel, iron.
NFe measurement mode
NFe stands for non-ferromagnetic substrate. The measurement of the coating on non-ferromagnetic substrates is based on the eddy current principle; this mode is called the NFe mode. This mode measures the thickness of non-conductive coatings (such as tantalum, rubber, paint, plastics, etc.) on non-ferromagnetic metals such as copper, aluminum, zinc, tin, etc.
At present, there are also coating thickness gauges have both Fe and NFe modes. Such a coating thickness gauge adopts both the principle of electromagnetic induction and the principle of eddy current, and is more widely used.
2. Zero adjustment of the coating thickness gauge
When the coating thickness gauge is used for the first time, after changing the battery, or when changing the measured material or the ambient temperature change, in order to reduce the measurement error, the zero adjustment operation is need. Generally, the uncoated surface of the same workpiece is used for zero adjustment (because the material and the zeroing plate may have physical properties such as magnetic or electrical conductivity. If there is no uncoated workpiece, you can use the aluminum zero plate or the iron zero plate in the instrument. Please choose the right substrate according to the material to be measured.
3. Coating thickness gauge unit
The unit of the coating thickness gauge mainly has metric units um and imperial units mil, 1 mil = 25.4 um.
These are some common proper nouns explanations of the coating thickness guage. If you have more questions, please feel free to contact us via the contact information on the website.
- High precision coating thickness gauge for used car
- Automotive paint protection films coating thickness gauge
- Plating Thickness Measuring Instrument for Detecting Anti-corrosion Coating
- Linshang LS220, LS191, LS160A– Necessary for Car Cover Inspection
- Coating Thickness Gauge for Second Hand Vehicle
- Zero Adjustment Step of Coating Thickness Gauge
